Selection Variable Labels
Labels within a selection variable are useful in keeping templates less complex and mitigate errors concerning conditional logic surrounding selection variables.
Within selection variable, you can select different options in the Select From section. If Options defined below is selected, a table will populate within the variable. Alternatively, if A table is selected, then a table is linked to that variable.
Text within a table can be may be really long. If you were to create conditional logic surrounding options within a table, would you rather create logic like this:
{[if WillType.Name == "My own will and trust"]}Any text or {[Variables, Formulas, or Templates]} needed if that condition is true.{[endif]}
or this:
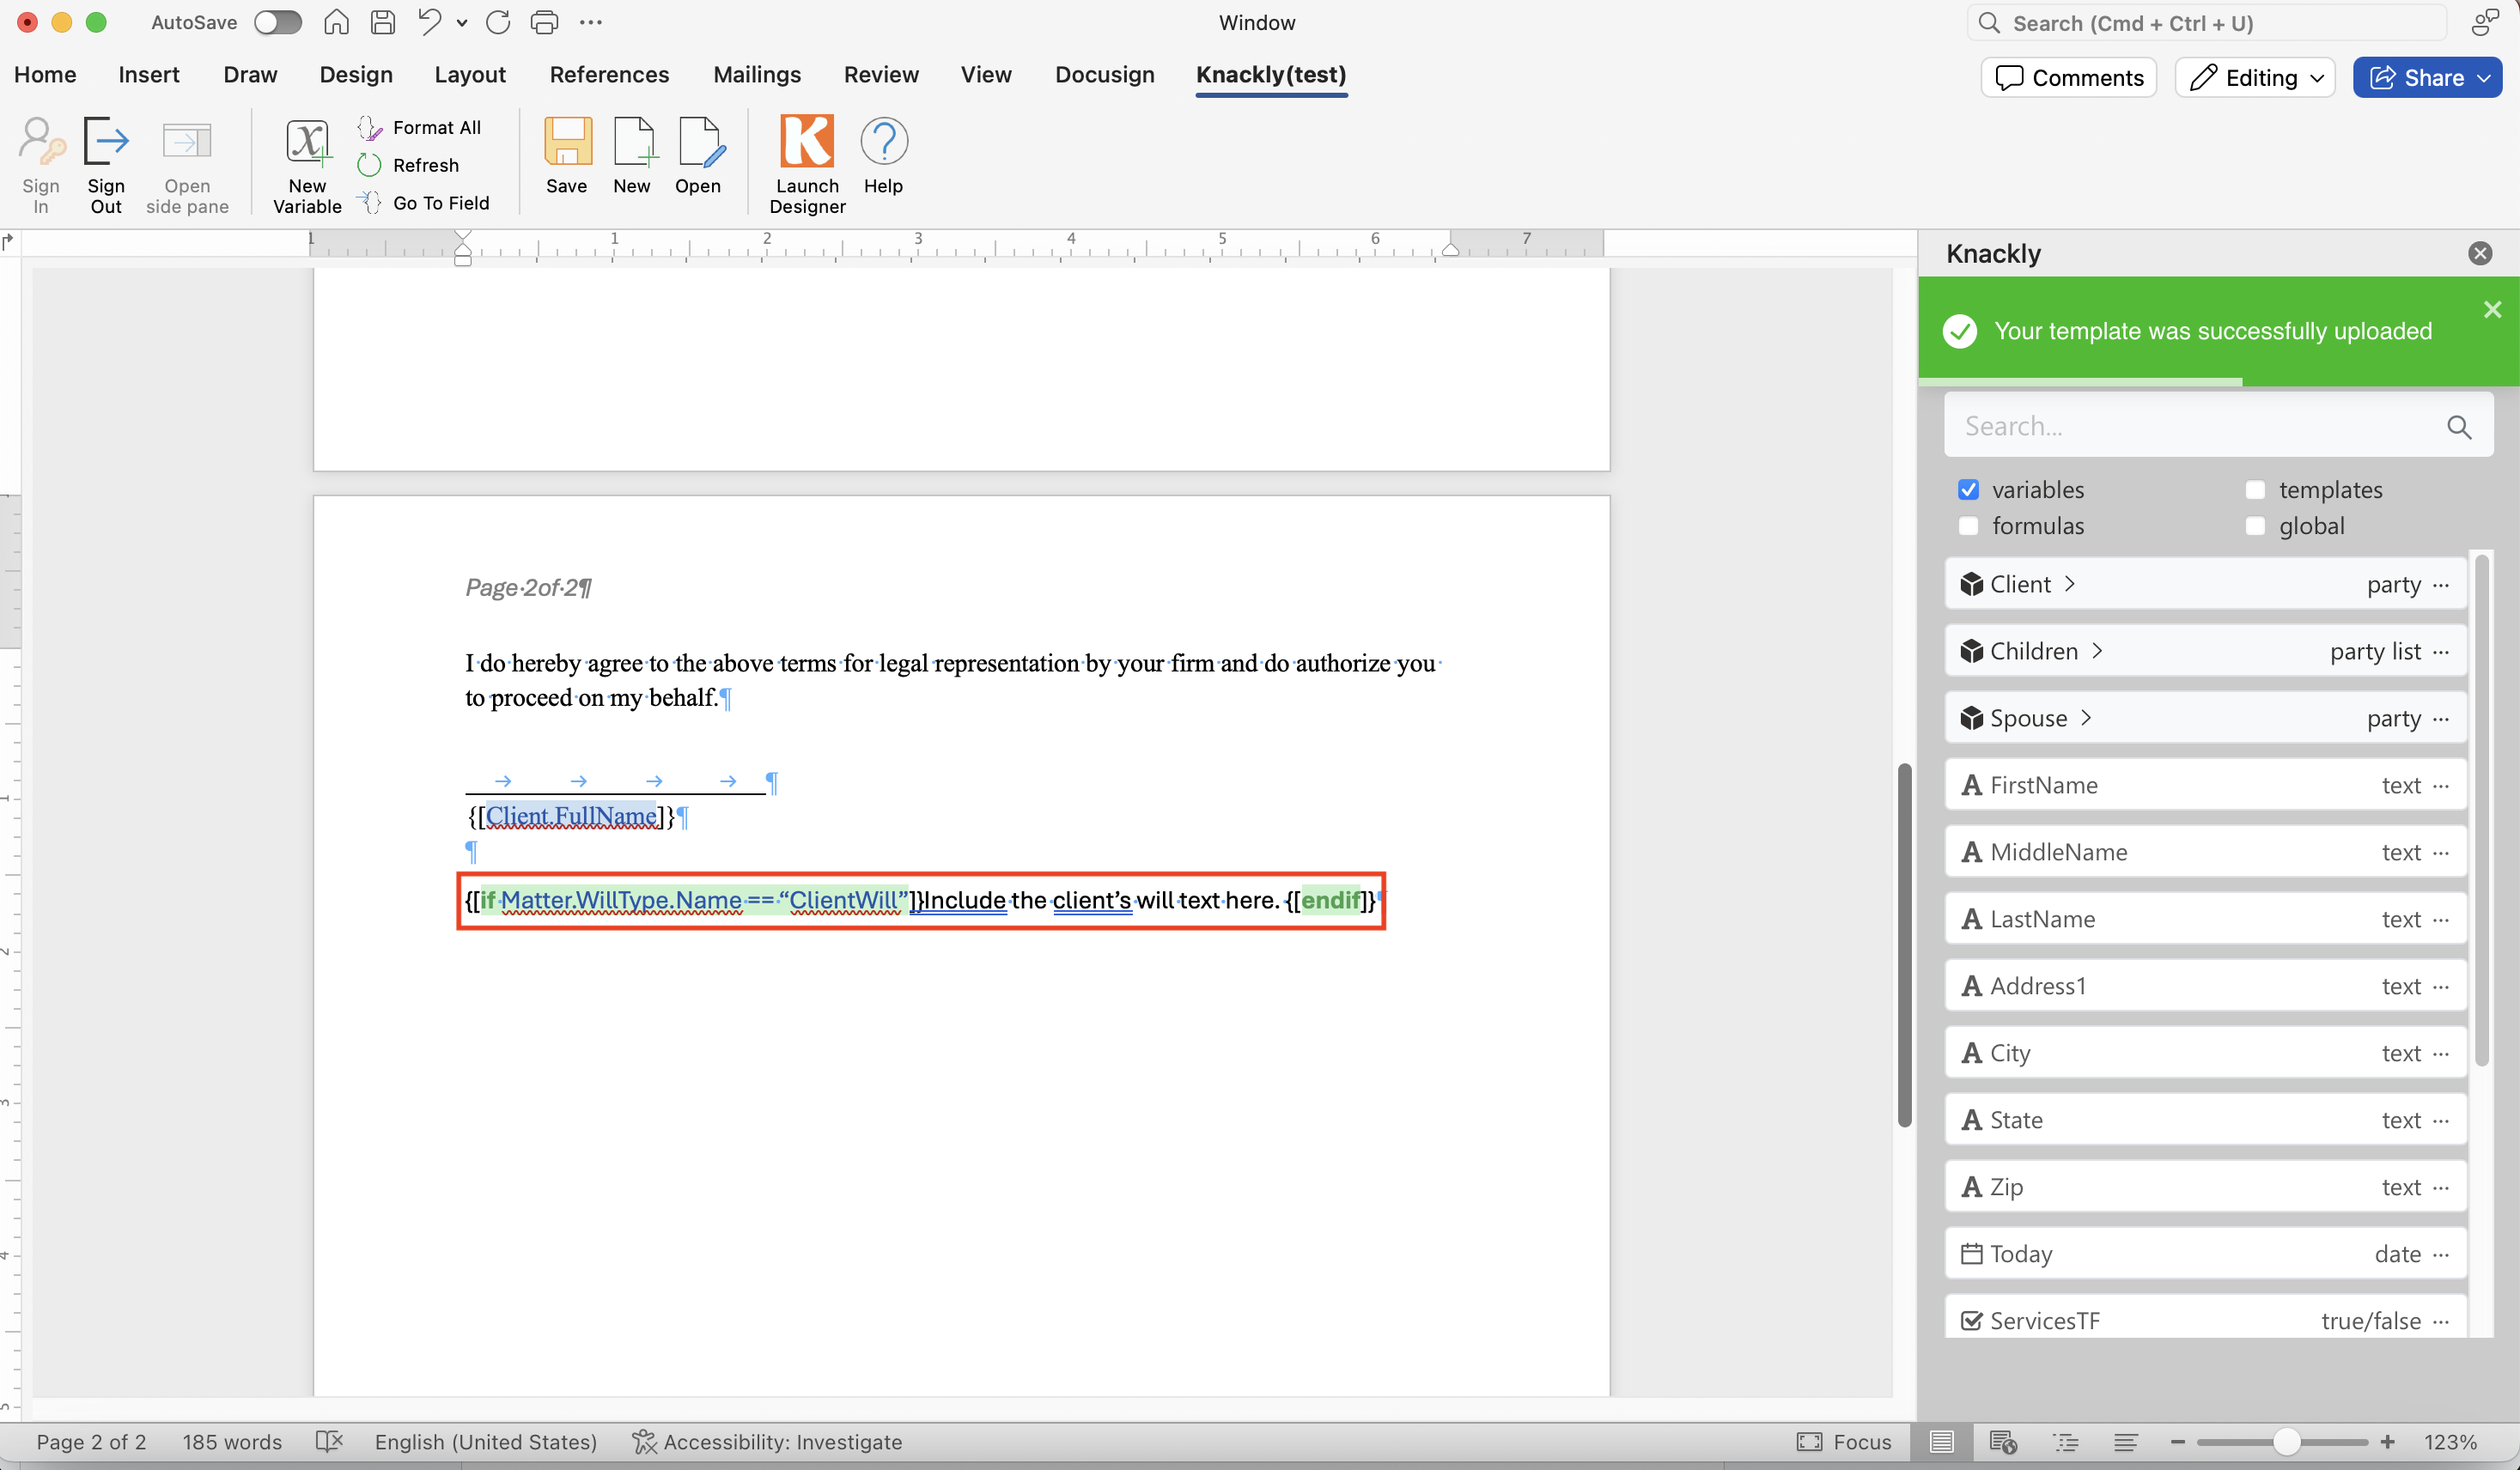
{[if WillType.Name == "ClientWill"]}Any text or {[Variables, Formulas, or Templates]} needed if that condition is true.{[endif]}
Additionally, if after creating your initial template you happen to change the text within that table, then your templates will now receive errors. This is another reason we create a Label column so no matter how often we may need to update the text within the table, your templates will not receive errors.
To create a label within your templates, follow these steps:
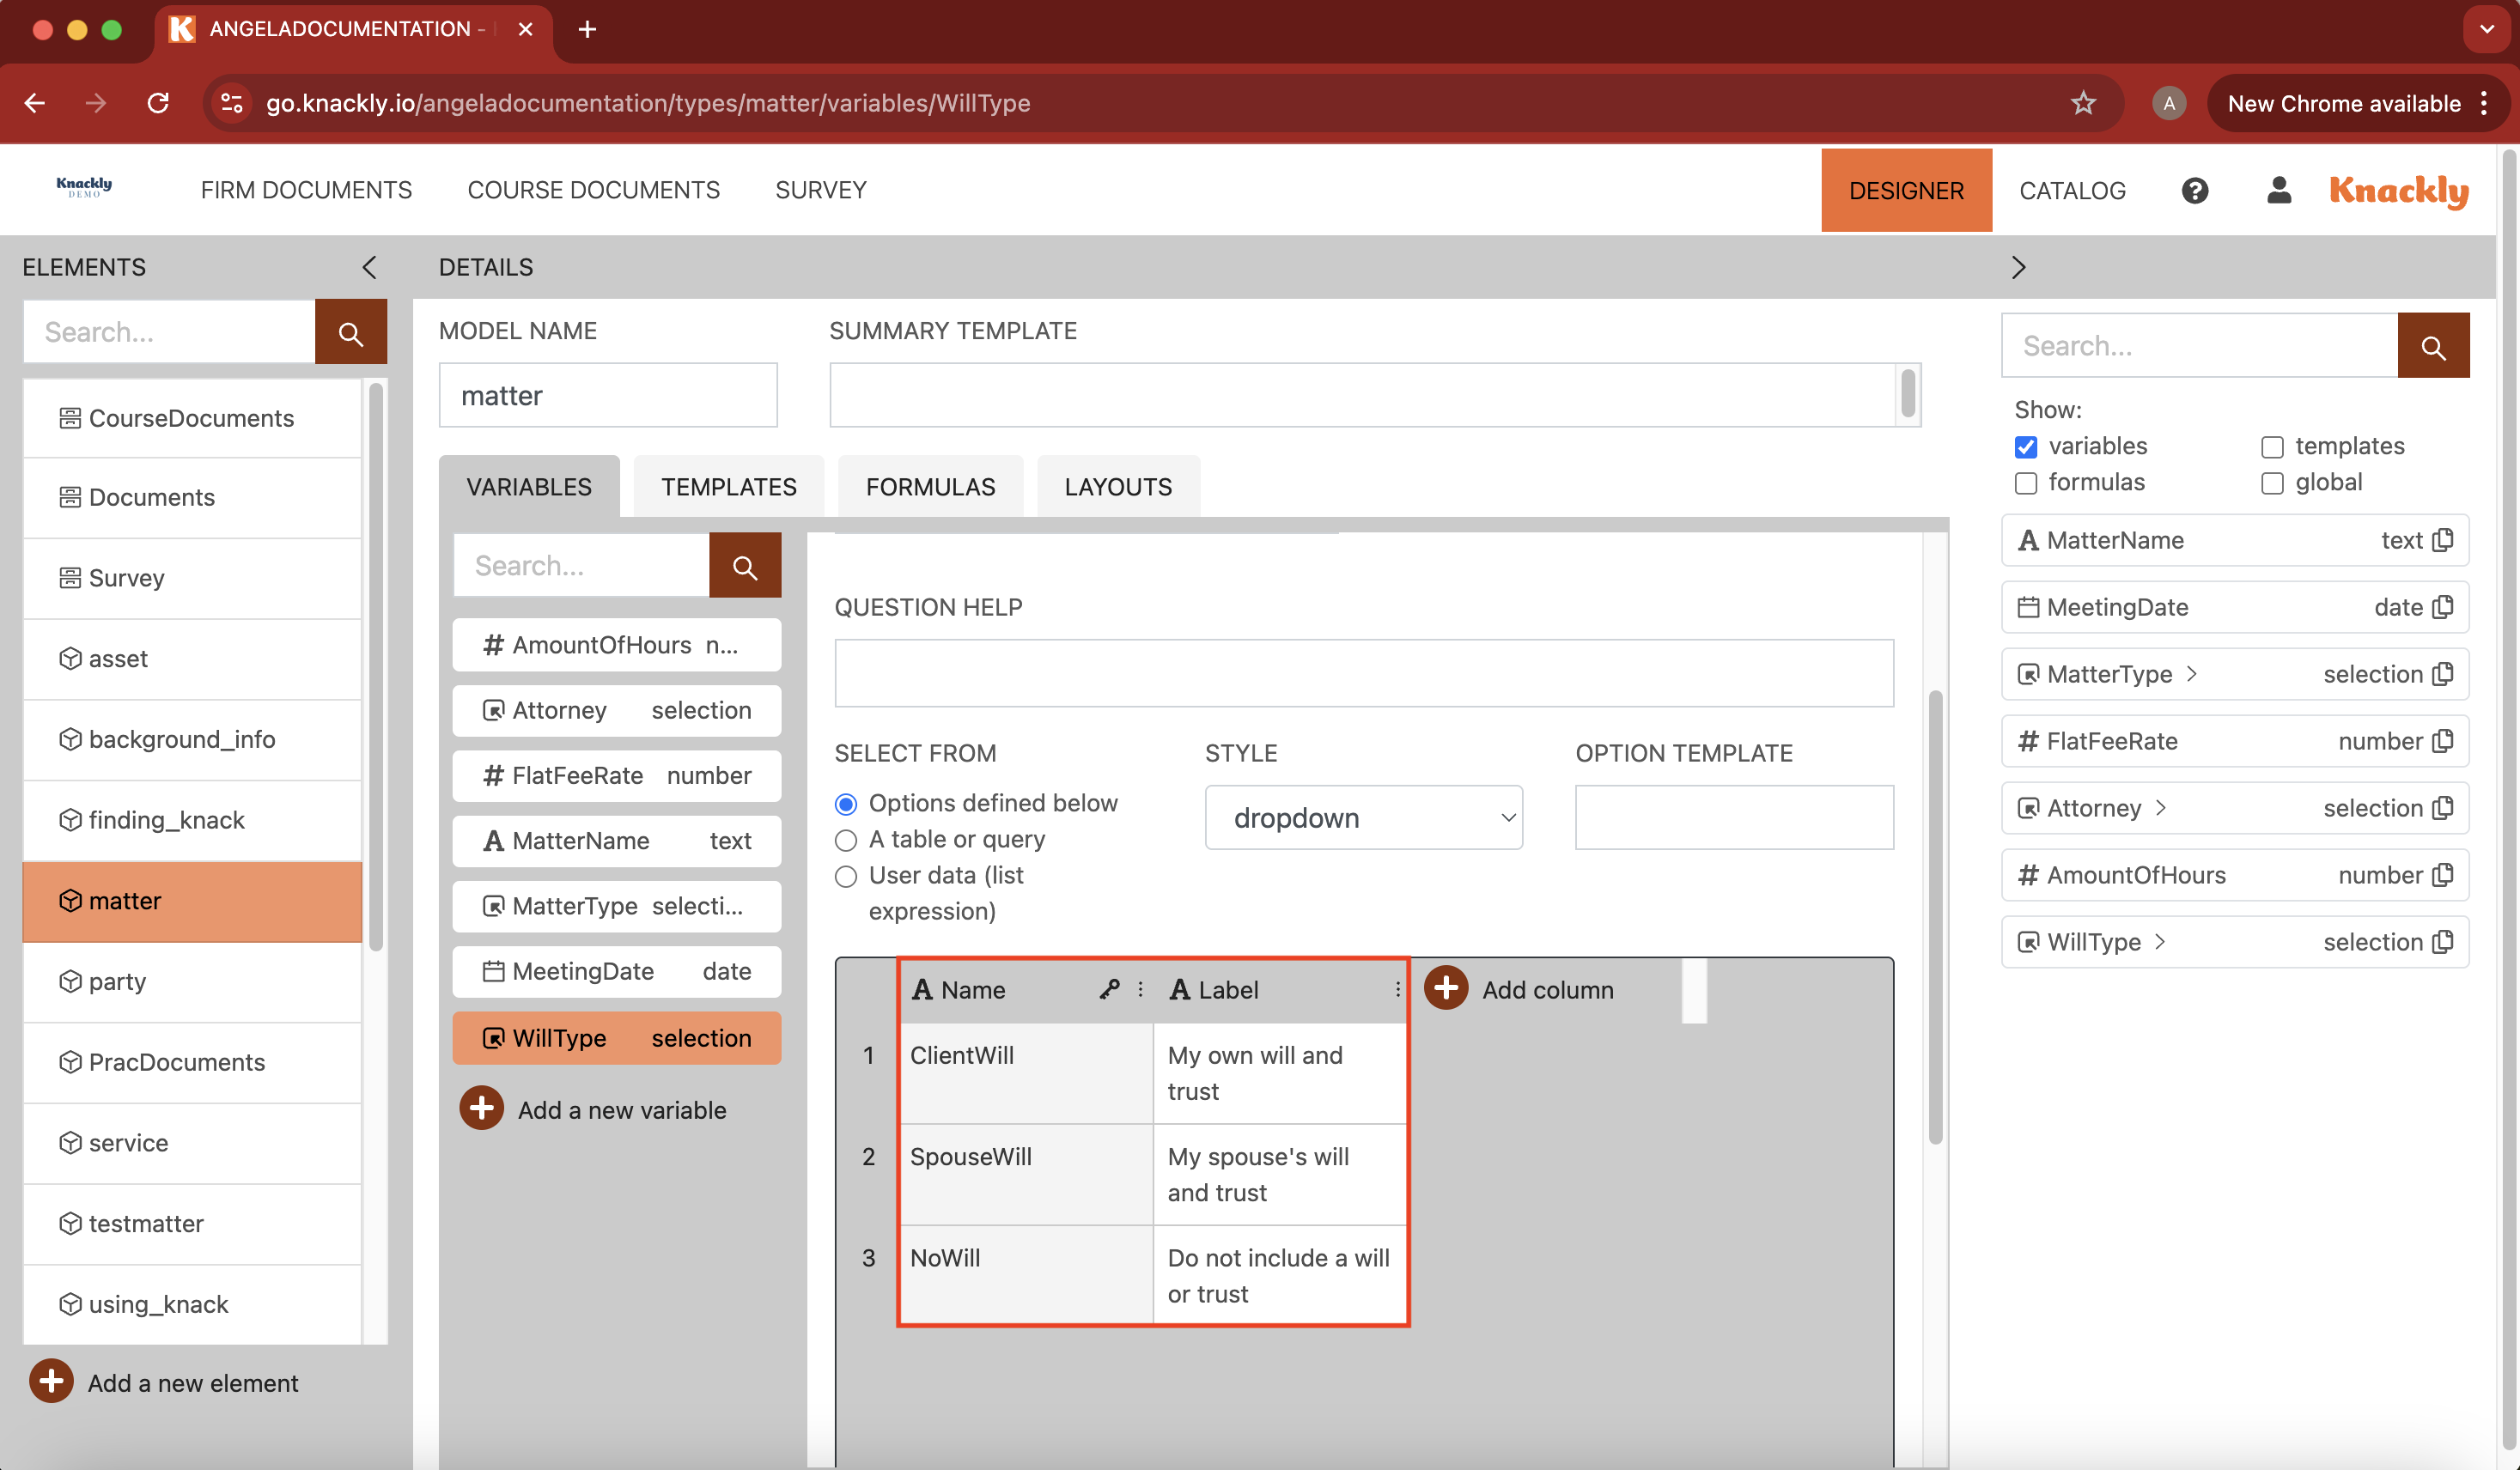
- Navigate to the selection variable you are adding a label to. In our example, we are adding to the variable WillType within the matter model.
- Select Add column. Name it Label. Within this column, we will actually copy and paste or insert our long answers.
-
Within the key column, which is identified by the little key icon, insert the shorthand for each option.
-
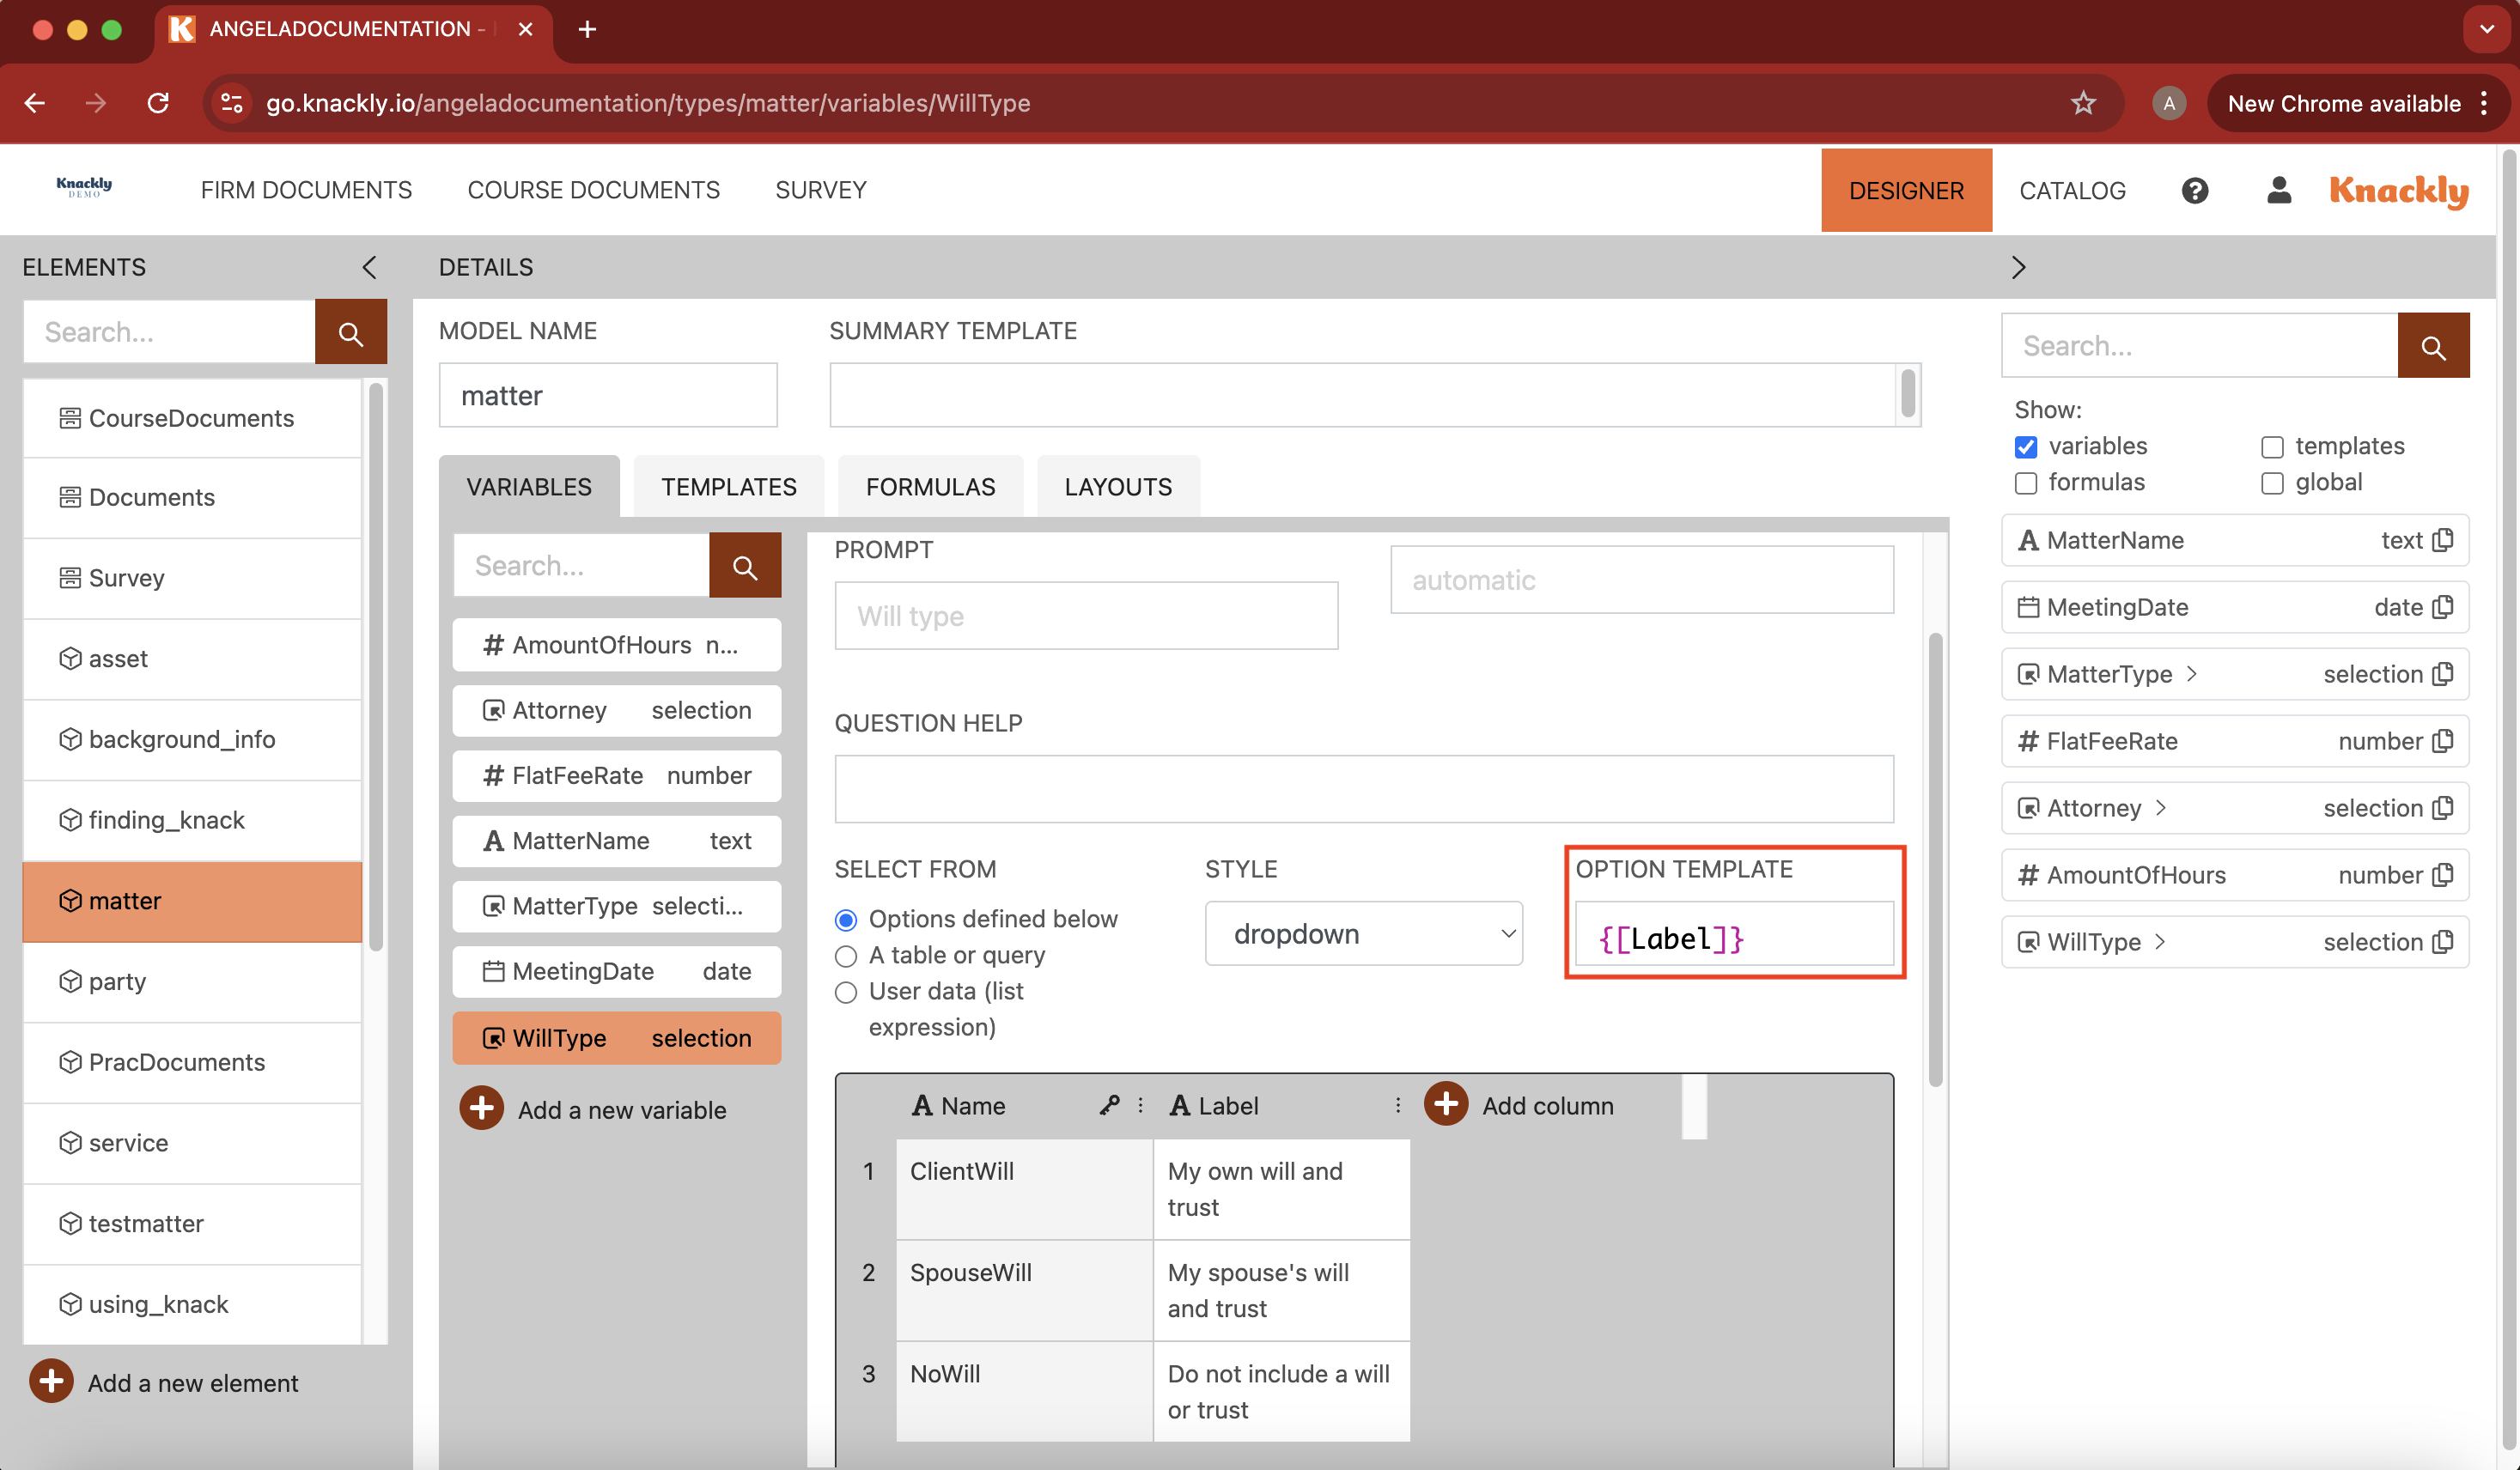
In the Option Template section of this variable, insert the column you want users to see within the interview.
-
When designing your template with conditional logic, use the Name column to do so. Save.
-
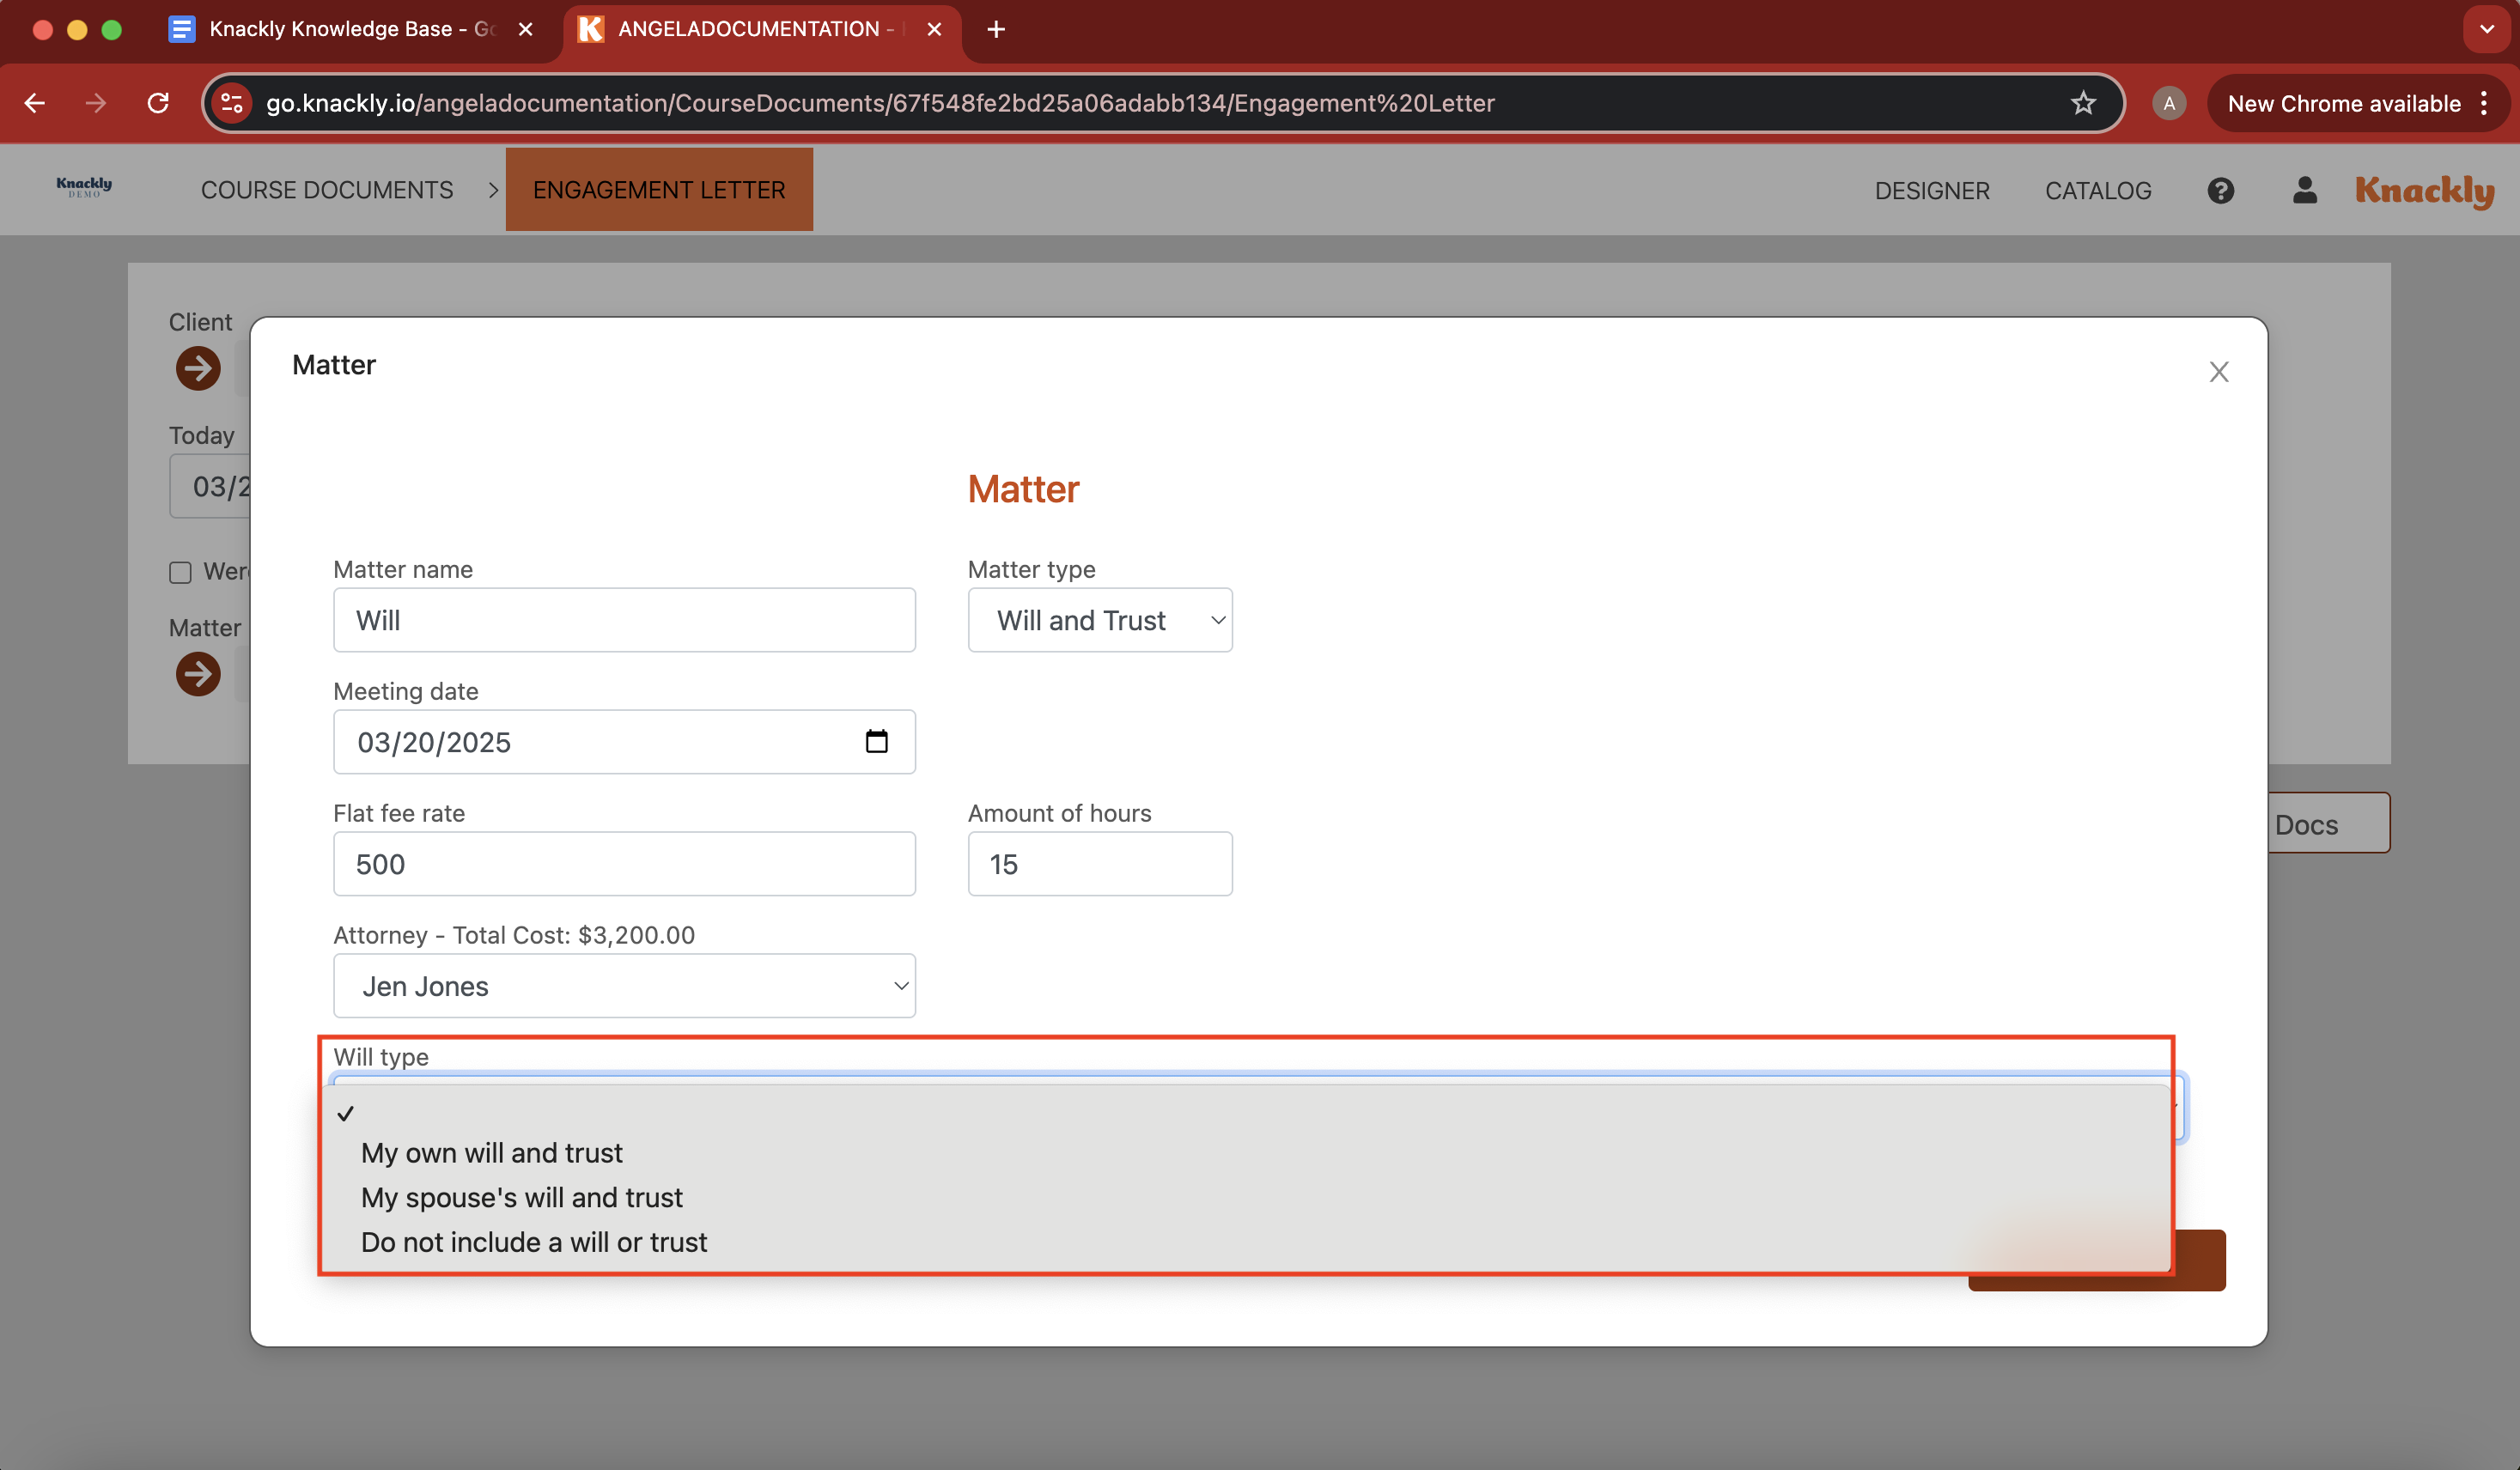
Within the interview, however, you will notice that the long text version for this option is what is within the Label column: